@d-healey Thanks for you input.
Yeah there is a look and feel there and I've I've spent hours trying to add an image component as a background, but asking a non-developer to just use a look-and-feel and slap an image under the knob is like asking a non-mechanic to build a car by just using an engine and slap some wheels underneath :-)
I've tried to leverage the code you showed in your video about adding an image to a panel, but can't seem to apply it to knobs. I watched the video bout the film strip but like I said this blocks/removes the name and value text.
Plus I would assume it'd be better practice to just have a single instance of an image in the code which i could also apply globally to all knobs.
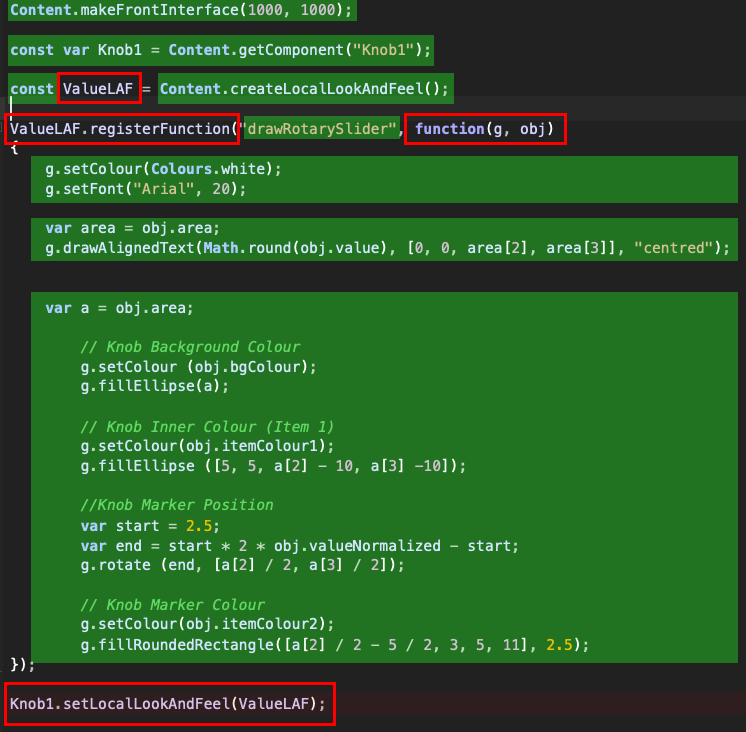
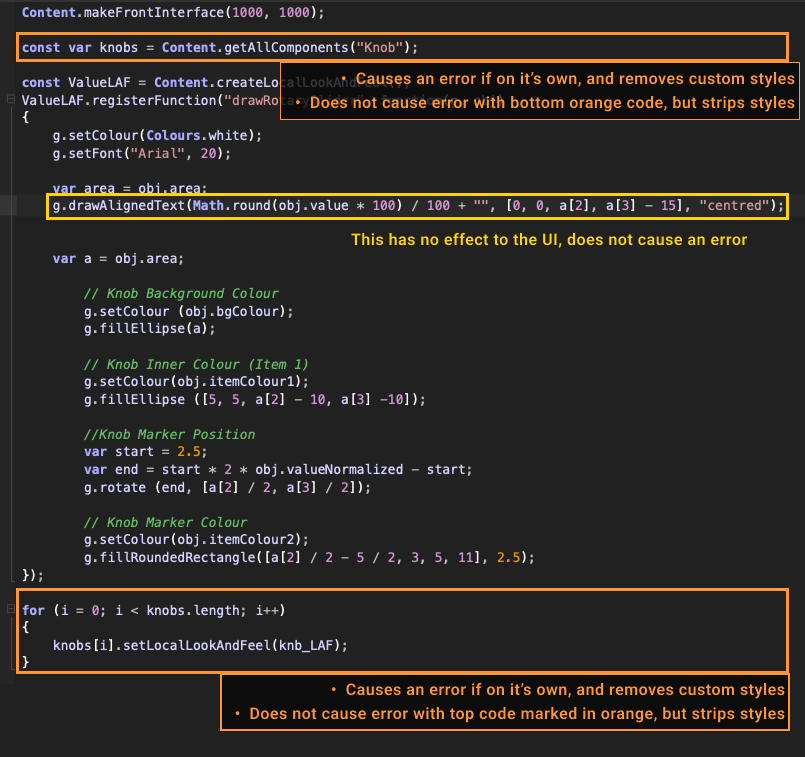
Here's the full code for the global rotarySlider styling.
const var knobs = Content.getAllComponents("Knob");
const ValueLAF = Content.createLocalLookAndFeel();

/// Rotary Knob
ValueLAF.registerFunction("drawRotarySlider", function(g, obj)
{
    var a = obj.area;
    var knobSize = 50;
    var x = (a[2] - knobSize) / 2;
    var y = 0;

    // Background circle
    g.setColour(SLIDER_BG_COLOUR);
    g.fillEllipse([x, y, knobSize, knobSize]);


    // Value text
    g.setColour(TEXT_COLOUR);
    g.setFontWithSpacing("Inter_18pt-Bold", 12, 0.08);
    g.drawAlignedText(obj.valueAsText, [0, 0, a[2], a[3] - VALUE_Y_POS], "centred");

    // Label text
    g.drawAlignedText(obj.text, [0, a[3] - NAME_Y_POS, a[2], 15], "centred");

    // Marker
    var angle = 2.5 * 2 * obj.valueNormalized - 2.5;
    g.rotate(angle, [a[2] / 2, y + knobSize / 2]);

    g.setColour(SLIDER_MARKER_COLOUR);
    g.fillRoundedRectangle([a[2] / 2 - 2.5, y + 3, 5, 11], 2.5);
});
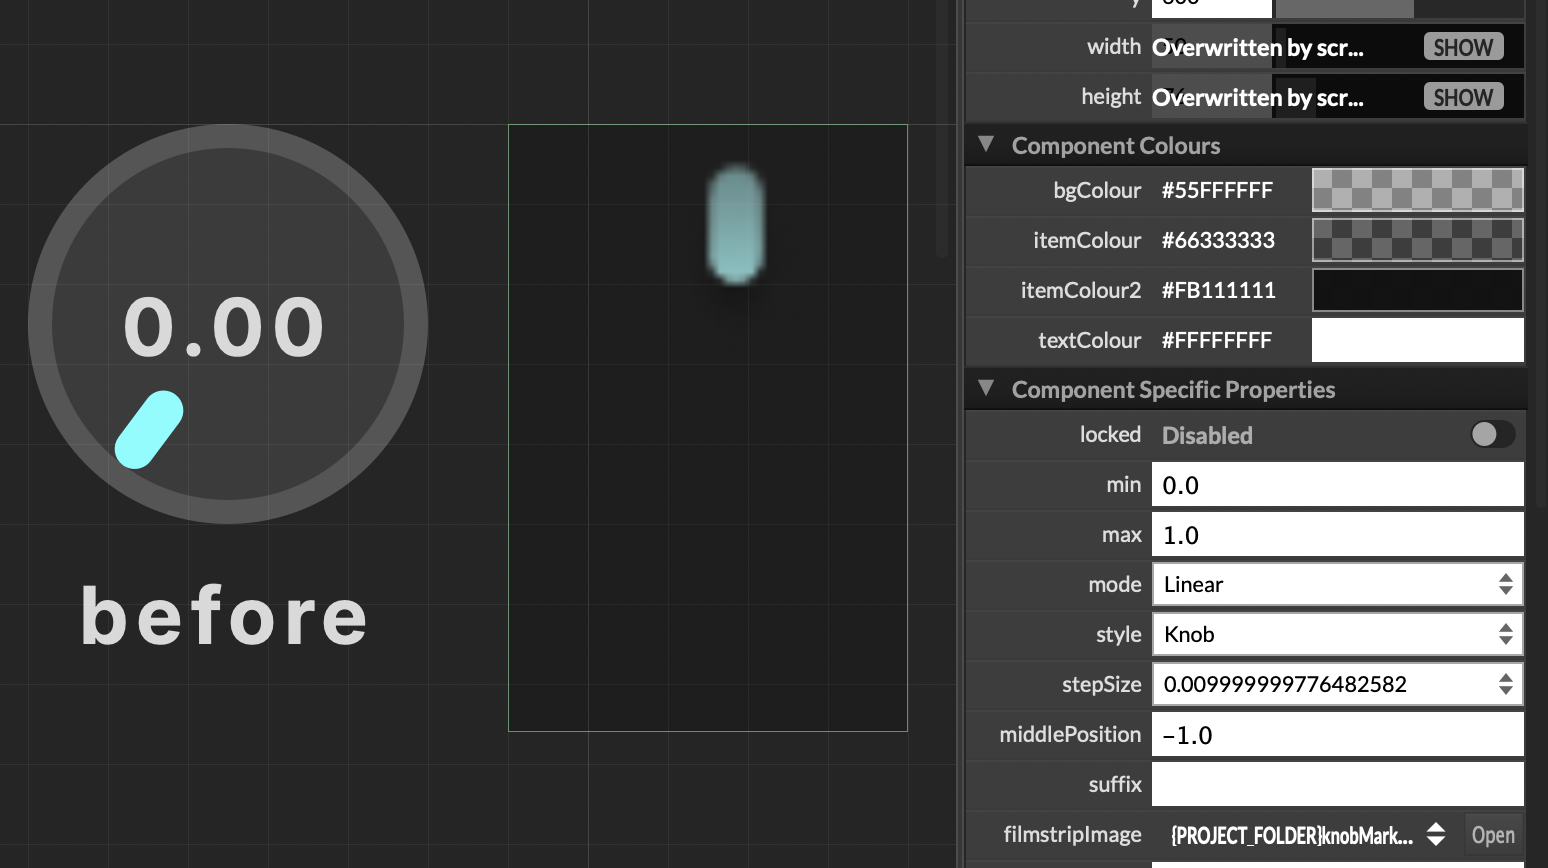
I just like to know what line of code I need to add to replace the bg-colour with my bg-image, and the marker indicator with my transparent image (both outlined in blue in my original post). If someone can let me know the code I will be able to understand what the correct solution is in this case, and in the future.