Tutorial: macOS Code Signing, Notorising and Installer (Part II Added)
-
Introduction
This tutorial series will guide you through the complete workflow of building a macOS installer, including code-signing, notarization, configuration the installer package, custom icons and graphics, automatic updates, relevant HISE scripting, compiling, file management, installing additional files (including samples), Bash-scripting and more.
Revised May, 2024.
Feedback/Corrections
Please share!
TOC
- Apple Developer Assets
- HISE Compilation Settings
- Signing, Notorising and Stapling Your Code.
- Building Your Installer
Disclaimer
The contents of this tutorial represent the author's personal opinions, and are not intended as a reference for any of the topics and content a within. As such, the author cannot be held accountable for commercial or other uses thereof. It is not represented as being up-to-date, and may contain factual errors. This tutorial is not an official communication by any of the parties, by name or implication. By reading this tutorial, you agree to these terms. Apple, please don't sue me.
Part I: Developer Assets
In this section, we will create the digital assets required to meet Apple's security policies for third-party executable files on macOS.:
- Your Developer ID and Entity name
- Developer Certificates
- App-specific password
- Manufacturer Code
Creating an Apple Developer Account
If you haven't already, create an Apple Developer account, either as an Individual or Organisation. The cost is $100/year (US).
Getting Your Team ID and Entity Name
 Find your Team ID and Entity name in Membership Details within the Membership section.
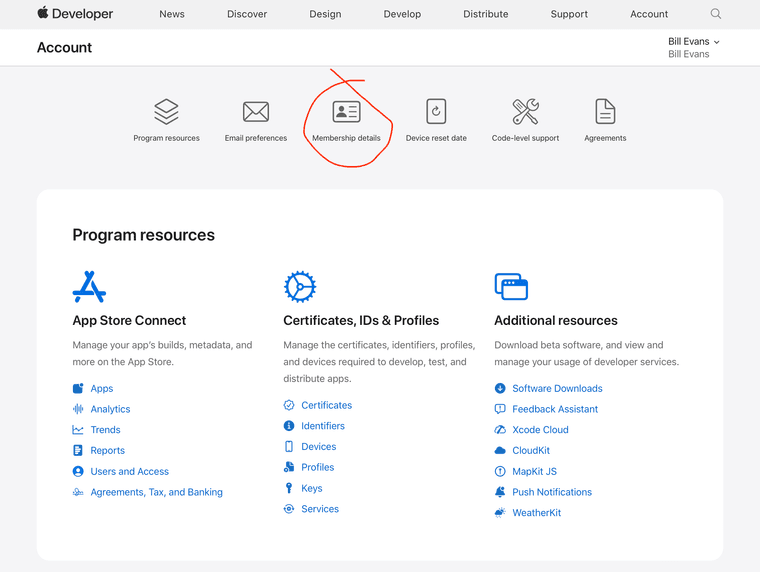
 Make a note of your TEAM ID, a 10-letter/number code unique to you as a developer.
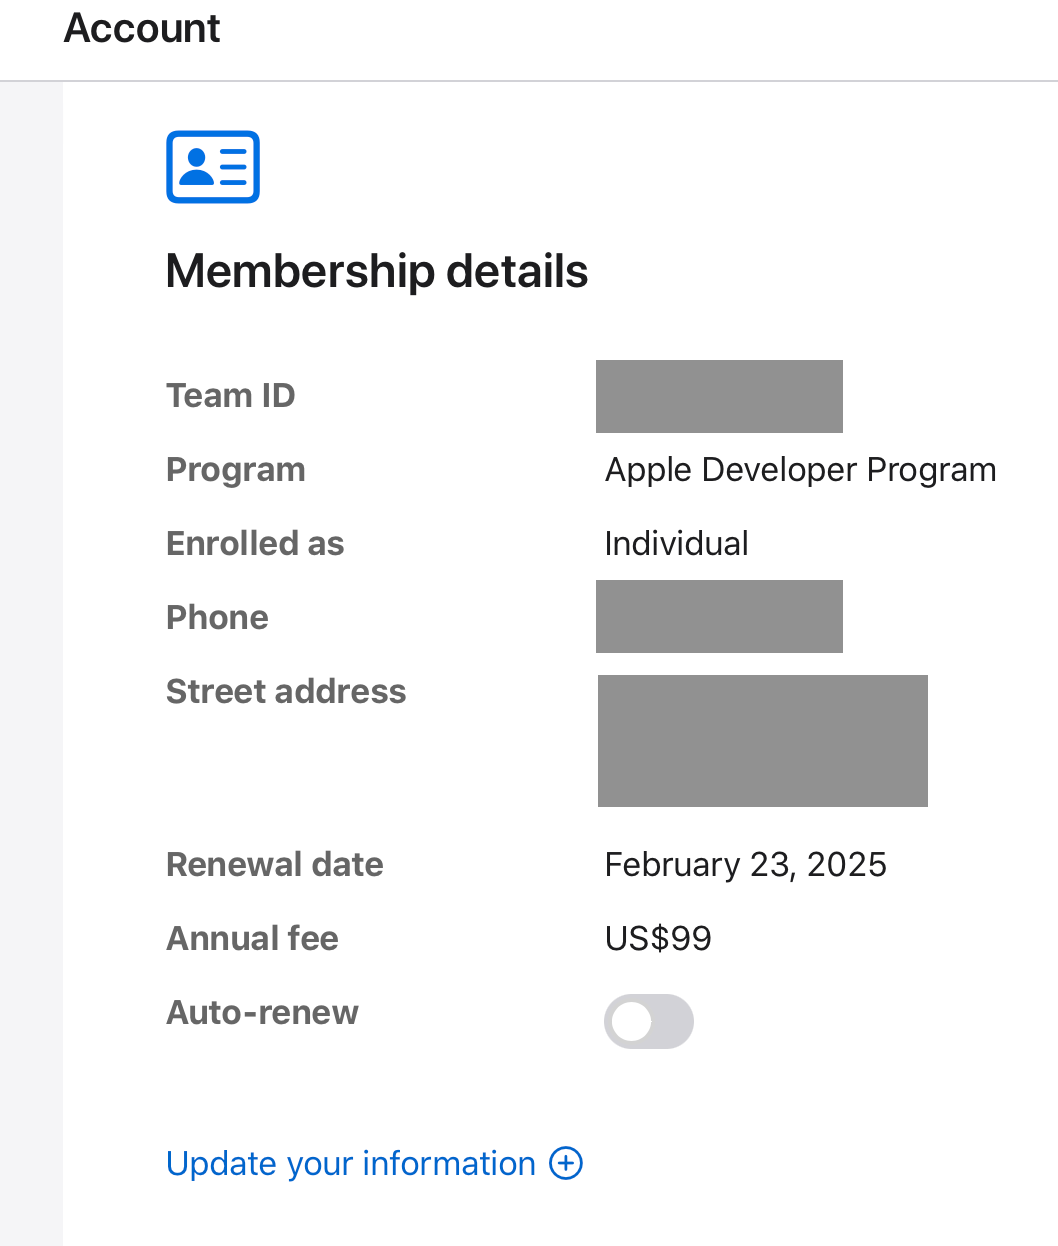
 Make a note of your Entity name. This process differs depending on if you have an individual or organisation account.
Individual: Your name, formatted exactly as in the upper-right menu item on Apple's Developer website (once you're logged in).
Organisation: Your "Entity name" as printed in Membership Details. (I'm an Individual member, so it doesn't appear in my screenshot.) It would be the first item listed:
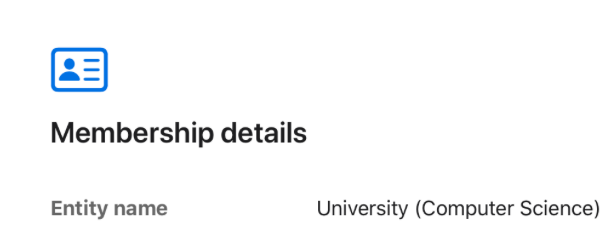
 You now have your Developer ID and Entity name.
Generating Certificates
You'll need several certificates from Apple; which ones you need depend on the specifics of your distribution vector. For this tutorial, we'll cover the most common ones.
 Click on "Certificates" in your Apple developer account. You'll see a list of the certificates Apple has assigned to you. Here's what it will look like when you're done:
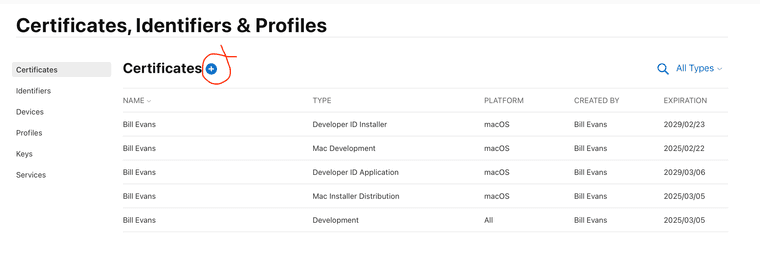
Just because a certificate is listed here does not mean it's ready to be used to create your installer.
 Click the '+' glyph to create a certificate, and then select one of certificate types in my list above.
You'll see one of two dialog boxes, depending on which one you create:

or
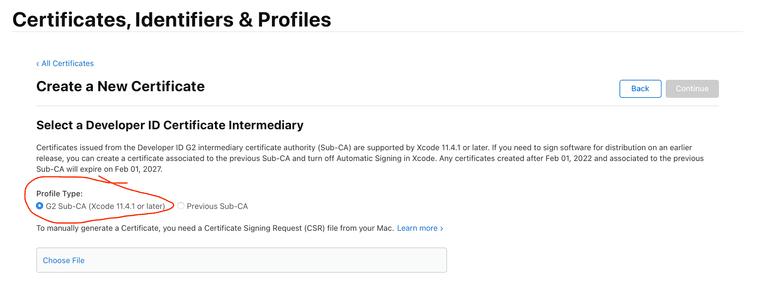
If it's the one above, ensure you choose the G2 Sub-CA Profile type.*
 On your Mac, you'll create a generic Certificate Request file. launch Keychain, choose the Certificate Assistant, and "Request a Certificate from a Certificate Authority…"
That will bring you to this dialog box:
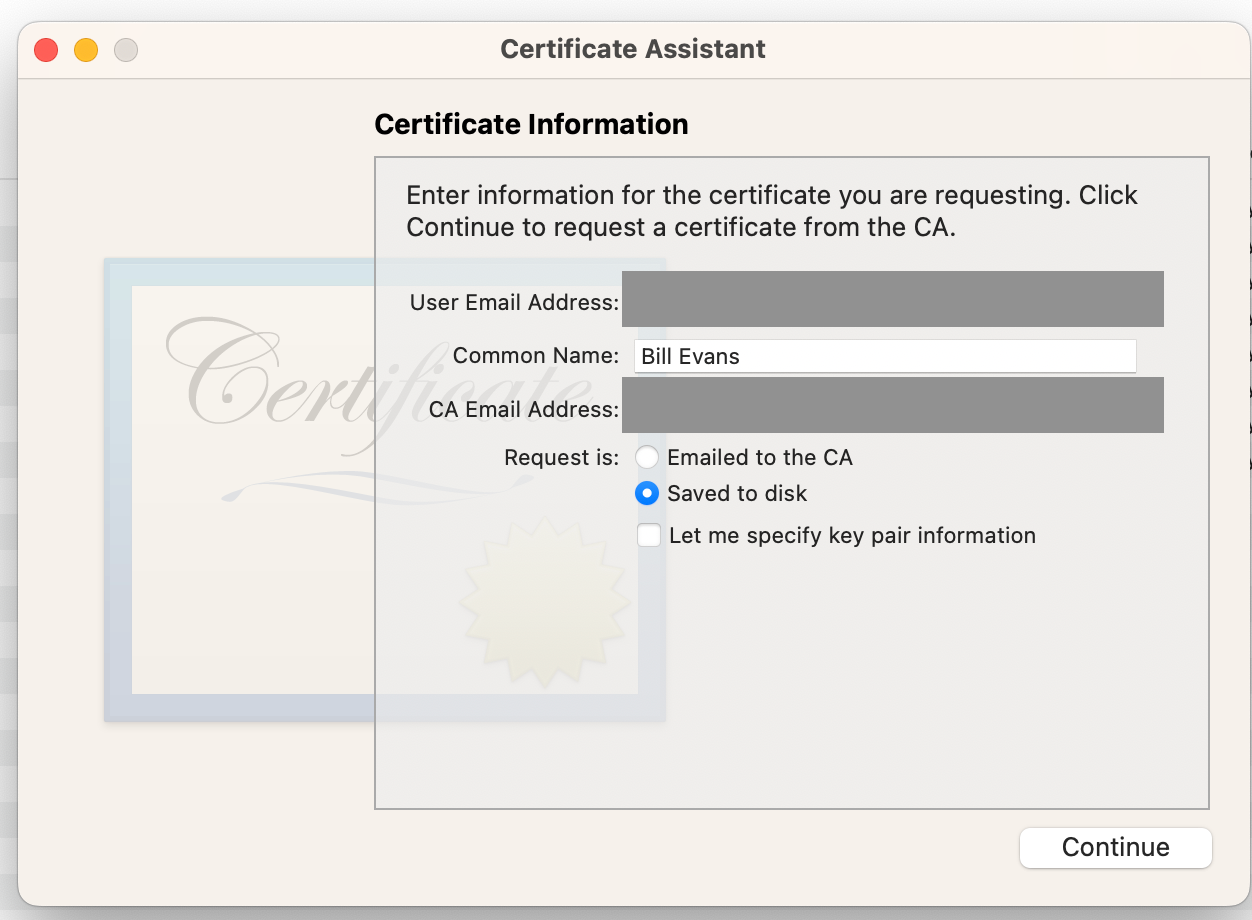
 Fill out the dialogue box:
- For both email addresses, use your Apple ID (that used when creating your Apple Developer account).
- Choose "Saved to disk".
- Do not select "Let me specify key pair information"
Click continue, and save the Certificate Request to your local mass storage. The filename isn't important; you'll delete this file shortly.
 Return to the Apple Developer website, select "Choose File", and choose the certificate you created.
 Click "Continue", and download the Certificate to your mass storage.
 Delete the Certificate Request file.
 Install the Certificate by double-clicking it, and following the on-screen instructions.
 Repeat this procedure for all the Certificates in my list. When you're finished, ensure they're installed by checking in Keychain:
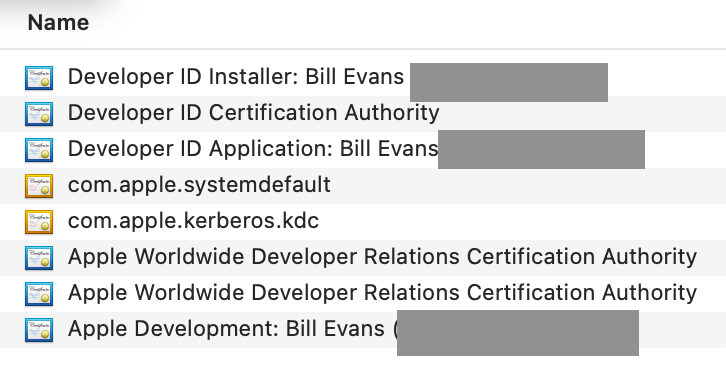
You're looking for blue certificates; the orange ones (com.apple.systemdefault" and "com.apple.kdc." are not related to this tutorial.)
 You now have the necessary Developer Certificates.
App-Specific Password
This step has recently changed. Previously, you would create app-specific passwords on Apple's Developer website. Now, that is reserved for use of optional Apple services and technologies — none of which of usually used for audio plugin. These security entities here are called Identities.
You now create app-specific passwords on Apple's consumer Apple ID website. But before we get to that, let's define what these passwords are: a layer of security to prevent third-parties from using (stealing) your Notorising identification.
Because this password is a security for a process, and not a product, you only need to create one App-Specific password for Notorising all your plugins. Let's walk through the steps.
 First, go to Apple's consumer Apple ID website. Given that Apple has several such websites, and that they change, you'll know you're at the website if you see this:
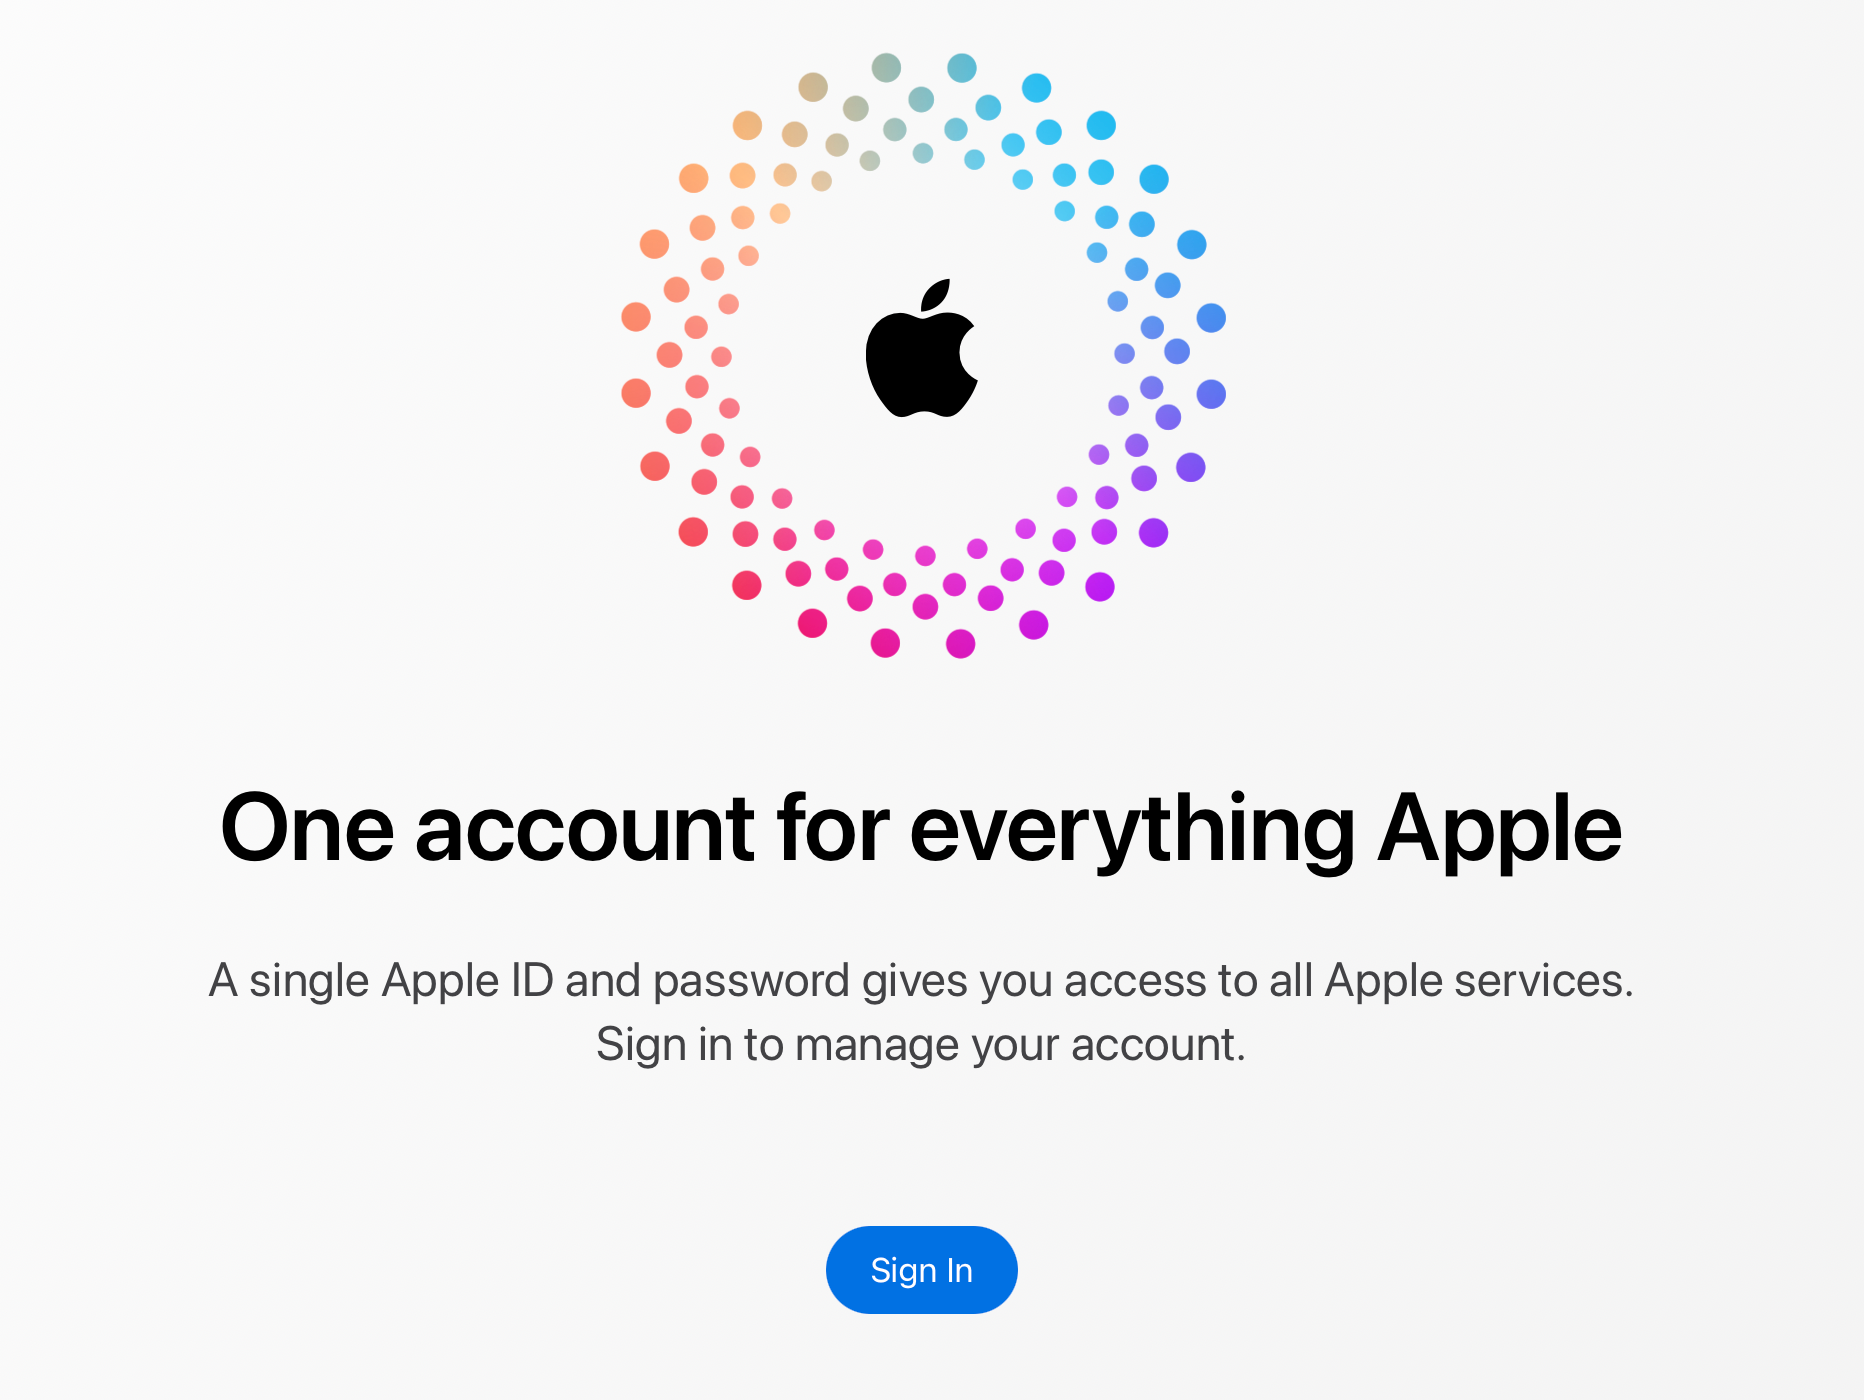
 Sign in. Ensure you use two-factor authentication when you sign in, or you won't be able to create the password. (This is set in your Apple ID account; just Google it if you need to see how, as this process periodically changes.)
 Choose Sign In and Security from the options presented. You'll then see this screen:
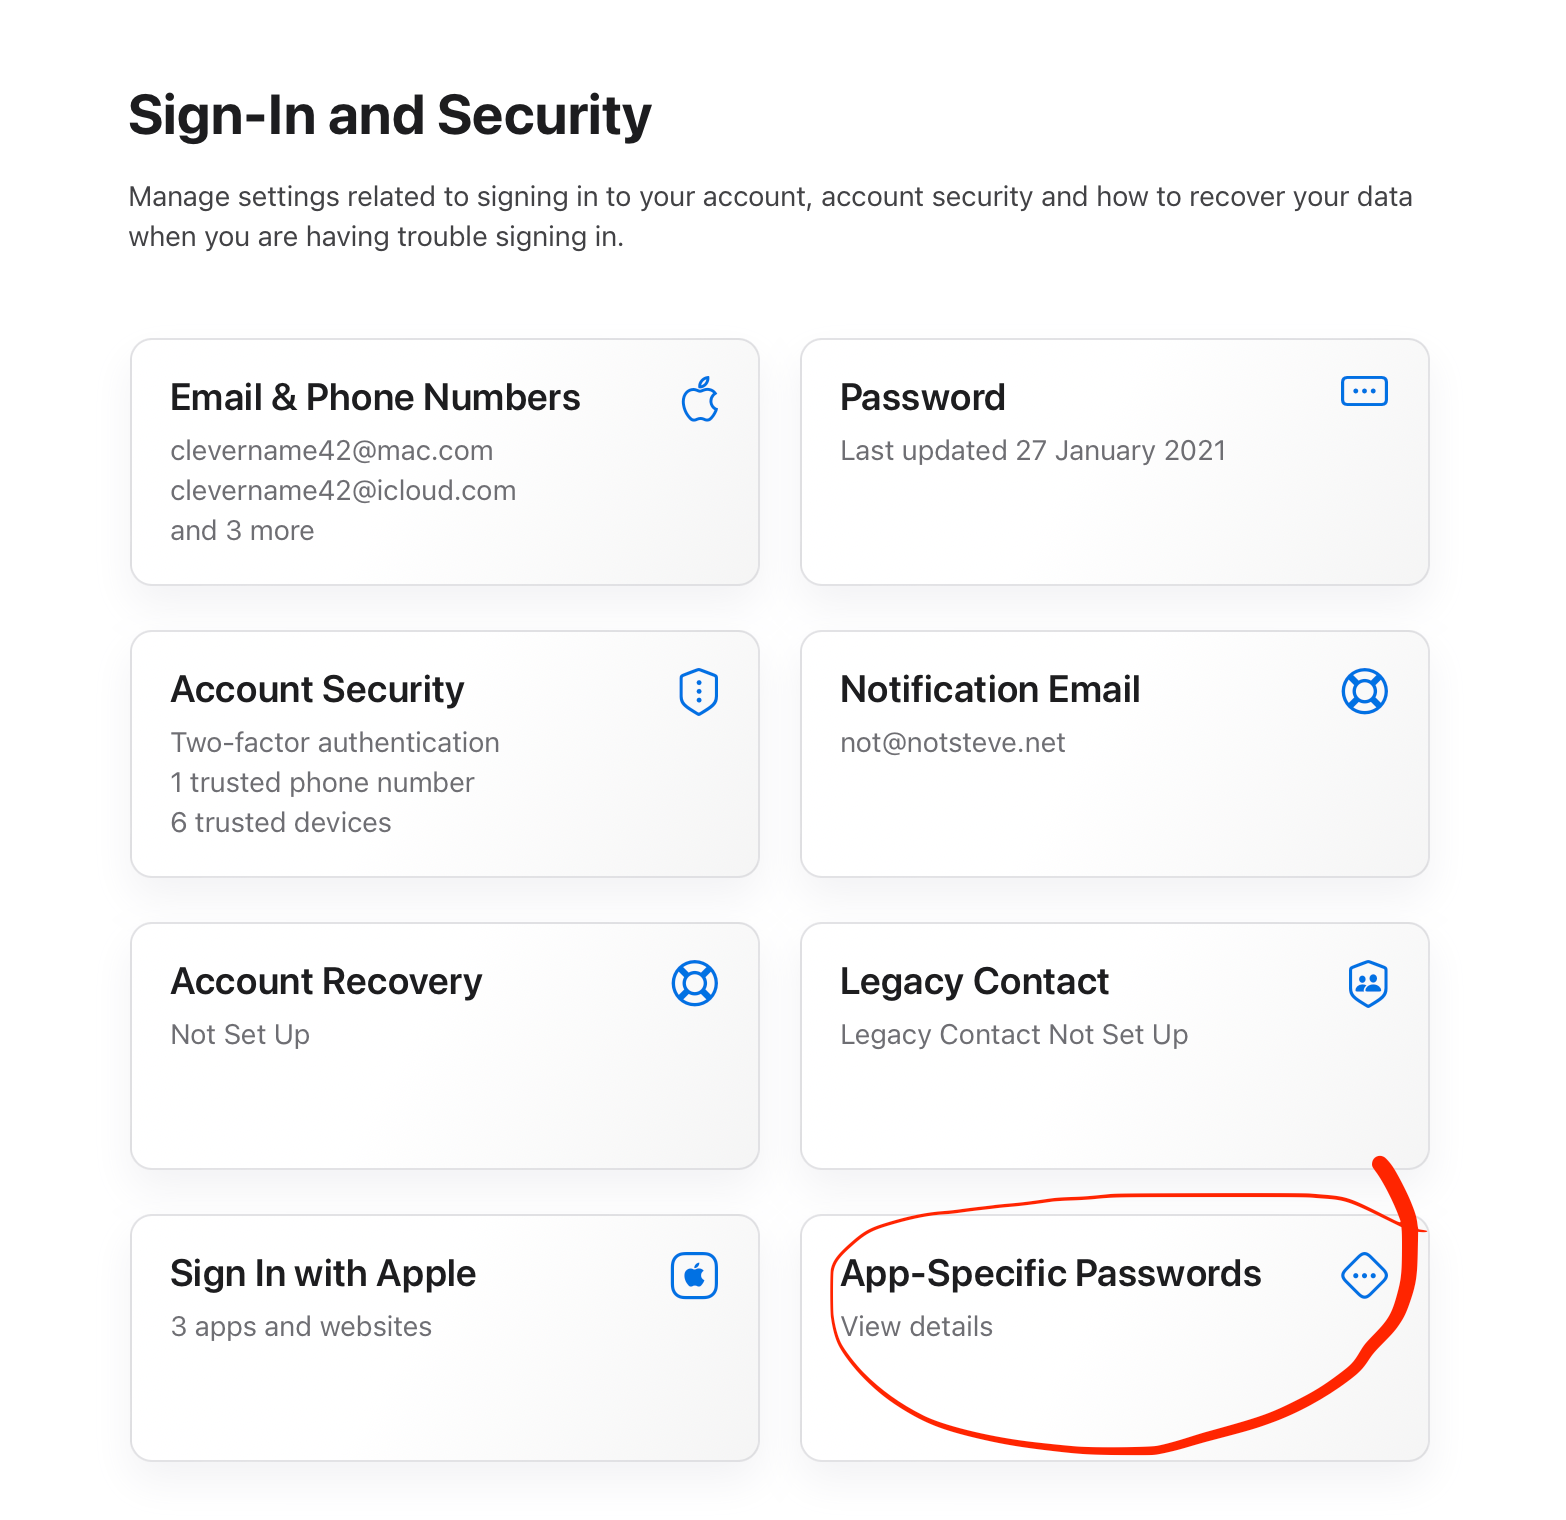
 Choose App-Specific Passwords.
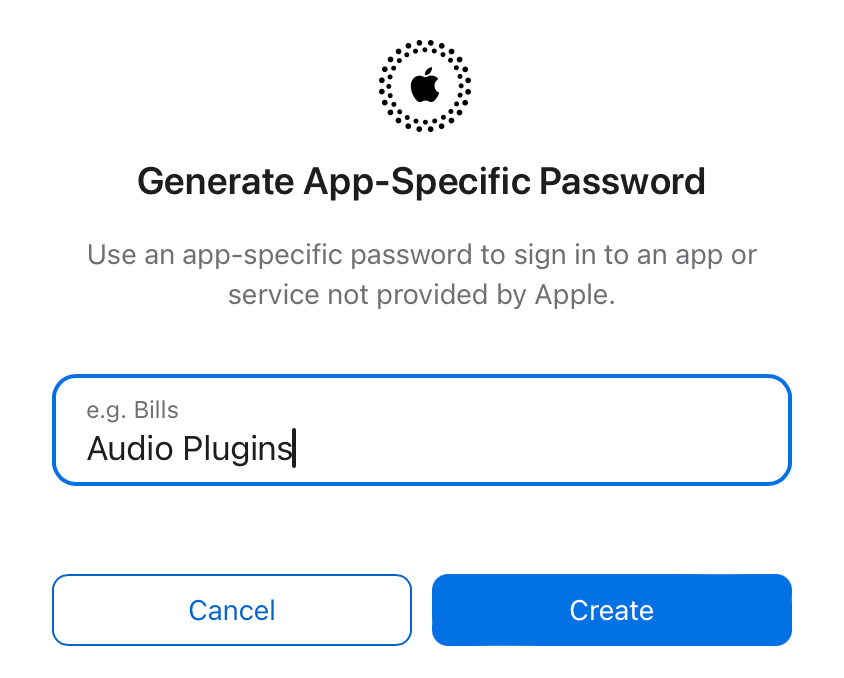
 Name your password. This name is for your own reference; call it anything you want.
 Apple will show you the password. Make a record of it—you will never be able to see this password again. While you can generate another password, any security entities linked to this password will be revoked.
 You now have the necessary Application Password.
App-Specific Identifiers
If you do need to create to create an app-specific identifiers, here's how to do that.
 In the Account section of the Apple Developer site, choose Identifiers.
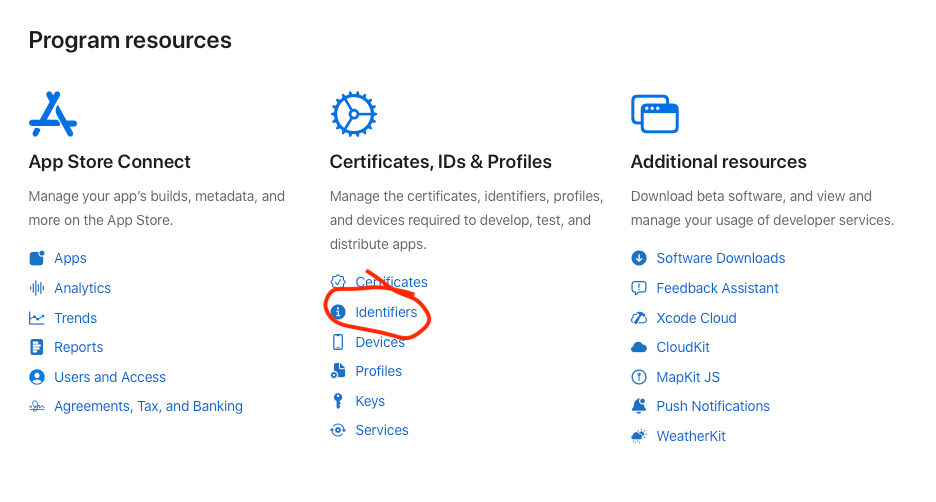
 Click the "plus" icon.
 Choose "App IDs".
 Select "App".
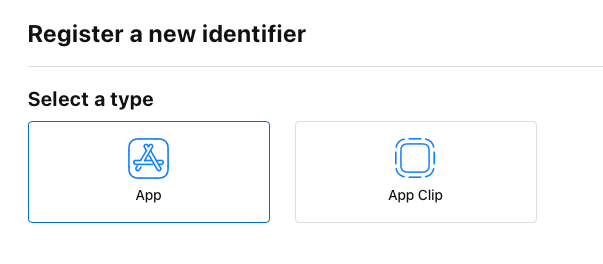
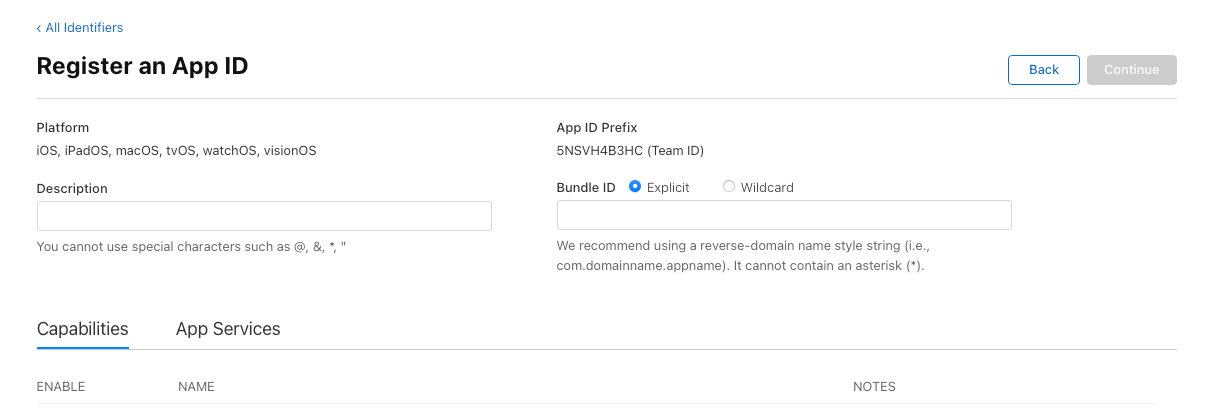
 Configure your Identifier.
-
Description: A proper name that describes and differentiates the Identifier to you. (You can write anything here.)
-
App ID Prefix: This field is data. While you have a bit of leeway here, I suggest you follow Apple's suggestion of using a reverser-domain name (i.e., com.domainname.appname). Ensure that your data does not match any other macOS apps; I suggest using a domain name (minus the TLD) that you own. For example, if I have a plugin called "Fighting Ferret", a valid Prefix would be "com.porkinsrocks.fightingferret".
-
Capabilities/Services:Select the specialised Apple service/technology for your plugin.
 Click "Continue" to complete the registration of your Identifier, and record your Apple Identifier. Ensure you keep this information, as Apple will never show it to you again.
 You now have the necessary Application Identifier. Notte that for some Apple services, you must now go through an additional application process.
Choose a Plugin Code
This is a unique four-letter code that must contain at least one capital letter that uniquely identifies your AU plugin to the macOS. You'll use this code inside of HISE.
Unfortunately, Apple no longer maintains this database (nor even active documentation on this topic). Regardless, you're still required to have one for each AU plugin you distribute. So…make one up, and hope nobody else is using it. Choose something based on your (or your organisation's) name, and avoid anything obvious (including variations on existing company names).
 You now have a Plugin Code.
-
PART II: HISE Apple Settings
Let's look at the two Apple-specific sections of your HISE preferences related to your installer. This is HISE executable you've been using to build your plugin — the options here don't apply to building HISE, itself.
Developer Information
The key fields here are :
- Company Code: it should match your Plugin Code.
- Team Development ID: Your Apple Developer Team ID from the previous step.

Product Information
- Product Name: Literally, this is the name of the plugin and/app file, after compilation. You'll also use this string later in building your installer.
- Version Number: Like Product Name, this will appear in the Finder, and also be used later in your installer.
- Plugin Code: If you know that you'll only (ever) make one plugin, the Company Code can be the same as your plugin code. Otherwise, use a unique 4-character code here (and use it for all your plugins).

 You now configured the options in HISE necessary for building your installer.
-
@clevername27 Your Company Code really shoild not be the same as your plugin code. You can use the same company code across all your plugin products and I think this along with yoir product code is what identifies tour plugon to au loading DAWs
-
@Lindon Thank you - I'll check on that. I was thinking that because Apple no longer supports a database of either, that the only thing important is that the values are unique to your plugin.
-
Part III: Building Your Installer
In this part of the tutorial, we'll look at the methods, issues and tools for installing HISE plugins.
Types of Installers
We can classify four types of installers you can use to deliver your HISE-based product:
Generic Third-Party Installer Executable
An executable application that places your payload (the files to install) in the specific locations they should go (e.g., the Audio Plugins folder). Most applications use this installation process. Examples include
Apple Disk Image
Disk images are typically used for payloads that don't require the user to install files in specific places (exception the Applications folder). The advantage of this process is the relative simplicity for you, the developer. However, this simplicity comes at the cost of flexibility.
HISE Project
HISE installers refer to mechanisms that are an official part of the HISE project.
Downloading API
HISE currently has an internal mechanism for downloading files. It is targeted for installing content such as sample libraries and impulse responses. It is a good choice for install content because you have complete control over the process, and you can implement it directly within your plugin.
The internal mechanism is usually used by HISE developers in conjunction with another one of the installation methods covered here. An advantage of this delineation is that it isolates the operating-system aspects of your installation from content installation (which through HISE is platform independent).
Multipage Installer
In the future, HISE will have its own built-in installer that covers the complete installation needs of a HISE project.
Copy Protection
Copy protection is a personal choice on the part of the developer, and I won't wade too far into that topic here. Relevant schemes for HISE developers include:
iLok is implemented with both cloud-based and hardware-based schemes. It is generally regarded as the most effective in the industry, and is priced accordingly. Their website provides more information. Implementing iLok within a HISE (or any other) product requires significant programming skills.
Steinberg's software-based copy-protection provides a good trade-off between protection and customer ease-of-use. It's also more affordable than iLok, and while it also requires a high level of developmental expertise, the experience can be more developer-friendly. More information is available on their website. (Full disclosure, I have worked on several Steinberg products.)
For most HISE developers, the most logical copy protection is the one built into HISE. This system is powerful, flexible, and fully-integrated with HISE.
To implement HISE's system yourself, you must be familiar with scripting in HISE. It is far easier to implement than other copy-protection systems.
Installers In-Depth
Let's dive deeper into our four types of installers.
Commercial Third-Party HISE Executable Installers
Some developers have created their installers specifically for HISE. These installers cover all aspects of a typical HISE product installation, and are cross-platform. These installers combine complete process for most HISE products, with features native to HISE.
A good example of such an installer is made by forum-regular @Lindon. With the demise of Whitebox Packages, Lindon's installer the only professional-looking installer (that I know of—I'm sure I'll be corrected if not the case) that covers the complete installation process. There is a cost associated with this installer, and you get what you pay for. Contact Lindon for more information.
 If you're a HISE developer who offers an installer, let me know, and I'll include it in this section.
Generic Third-Party Installers
Generic (meaning not specific to HISE) third-party installers have the advantage of (theoretically) providing the most flexible installation system. Often, they are also cross-platform.
Whitebox Packages
For over a decade, this installer has been the stalwart for macOS installation. It has a simple GUI, and provides significant control over the installation process via optional scripting. The most significant limitation is that a single install cannot target both user and system directories (though there's a hack to get around this).
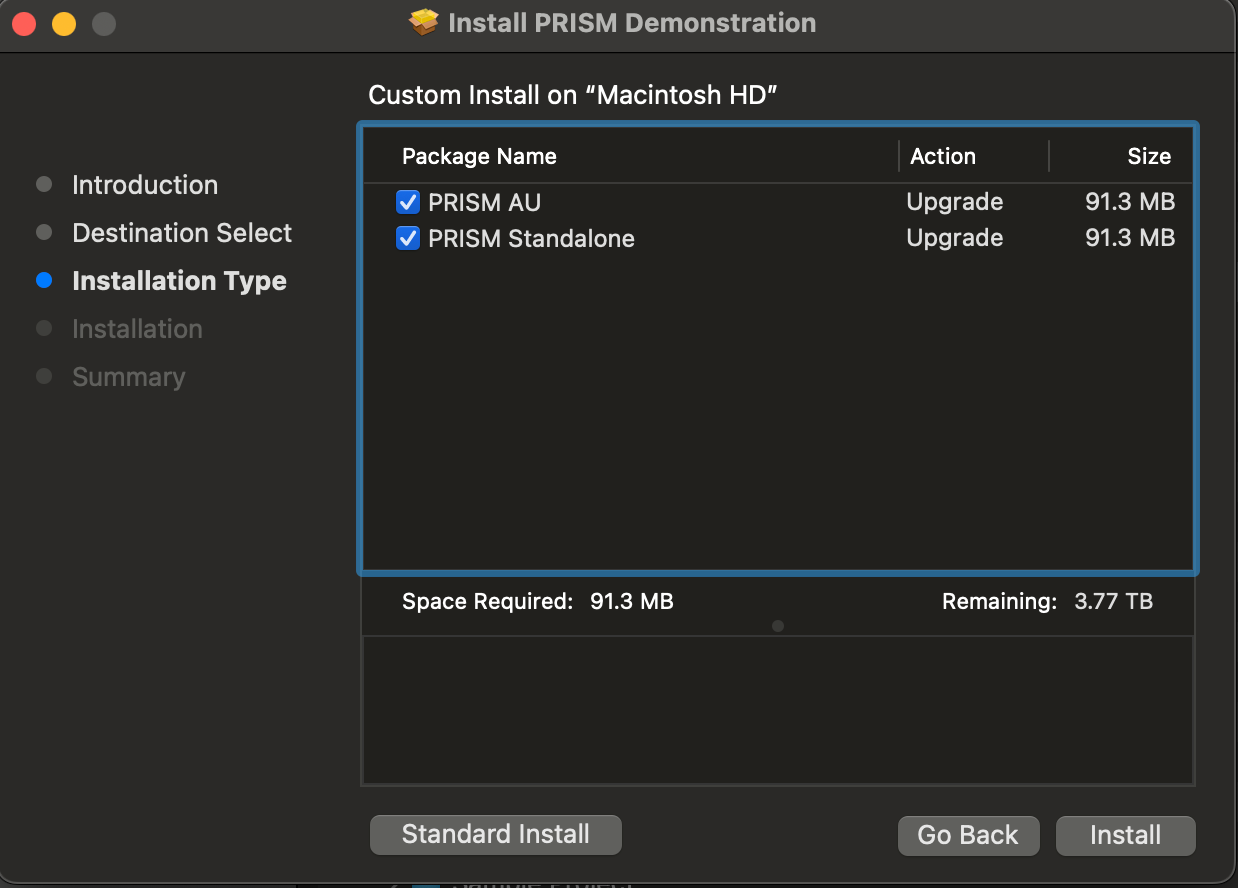
It's also free and open-source, and has the look and feel of the macOS. It does not provide copy-protection, and is not cross-platform.
Development on this product appears to have ceased, and it is no longer functional for some configurations (which, for installers, means no longer functional). For example:
- The built-in automated security procedure no longer functions.
- For Apple Silicon machines, requires a beta version that is not publicly disclosed.
- Does not (reliably) install payloads in their designated location(s).
- macOS only.
While there are other generic third-party installers, I don't personally recommend them. One reason is that have the look and feel of early 2000's Qt, and do not look professional.
Apple Disk Image
Apple Disk Image is a disk image format commonly used by the macOS operating system. When opened, an Apple Disk Image is mounted as a volume within the Finder.
Disk Images are a simple way to provide for the installation of executable and content payloads.
Apple Disk Utility
Disk images be can be created with the macOS's Disk Utility application. To provide flexibility for the installation, you should be familiar with developing for macOS.
Using Disk images to distribute your product is free, and does not provide native copy-protection.
Canvas DMG
Until recently, disk images were not an effective mechanism for HISE installation because it lacked flexibility, and required a completely manual process for implementing Apple's security procedures.
However, Canvas DMG alters this calculus.
The primary advantage of DMG is the automated security procedures. The value of these cannot be overstated. Even though I am proficient in using BASH to manually sign, notarise and stable my payloads — I use DMG because of its security implementation.
DMG not only process the disk image itself, but also the contents within the image. It also manages to get through some elements that can otherwise be problematic, such as custom application icons.,
As commercial product, DMG is fully documented, has technical support, and (theoretically) will make any changes when Apple inevitably changes to their security procedures and file system API.
DMG is limited to files that users can drag to folders. You can make a system folder accessible (but not pass any security checks) by creating an alias of them in the installer. DMG has a menu item to create such an alias for the user's system application folder.
 You can provide aliases other system folders by dragging them onto the disk image canvas, and holding down the CONTROL key as you release the mouse.
The DMG system also provides a (safe and reliable) hack to Apple's APIs, allowing you to (easily) add text and images, to the Disk Image.
DMG does not offer automated Installation: The user must do the work. For many installation scenarios, the requirements are negligible (i.e., drag a file). For more complex needs, users may have difficulty or make makes during the installation process. Given its installation mechanism, a DMG installer does not have access to User Folders.
While theoretically platform independent, you'd only want to use Apple Disk image for macOS installations. Therefore, with DMG, you'll need installers for Windows and GNU/Linux. As a native macOS application it provides a superior experience for macOS users, both visually and in terms of look-and-feel.
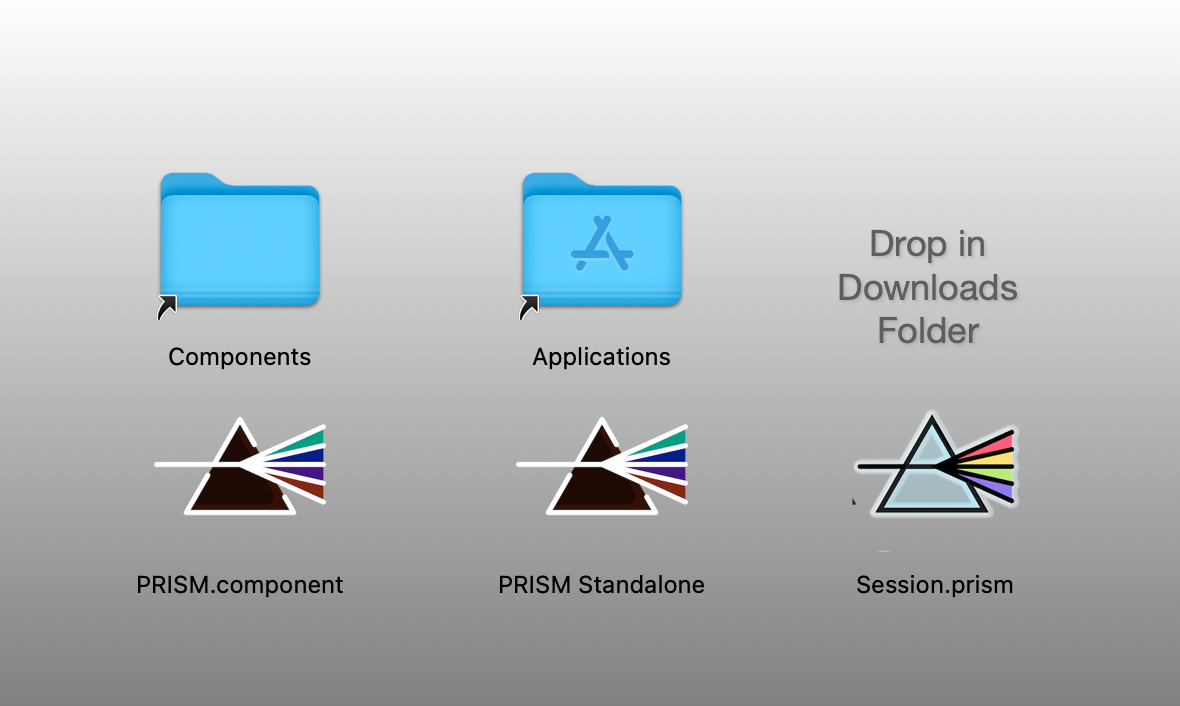
DMG does not support native copy-protection, and that's not a disadvantage to developers who either don't use copy-protection or use a separate system. Canvas costs $25. I'll editorialise here and say that this is next-to-nothing. I don't list that as a disadvantage because it's only $25.
Canvas can be purchased at Araelium's website.
Commercial Third-party HISE Executable Installers
@Lindon's installer, from Channel Robot is a full-spectrum installer. It provides the ability to install both executables and content, and also uses HISE's native API. It is a commercial system.
I'll editorialise again for moment and say that this is a unique product because it provides almost all of the advantages of every installation system. (It is also priced accordingly.) @Lindon is an expert in HISE, himself, and can further advise on HISE-speciic installation.
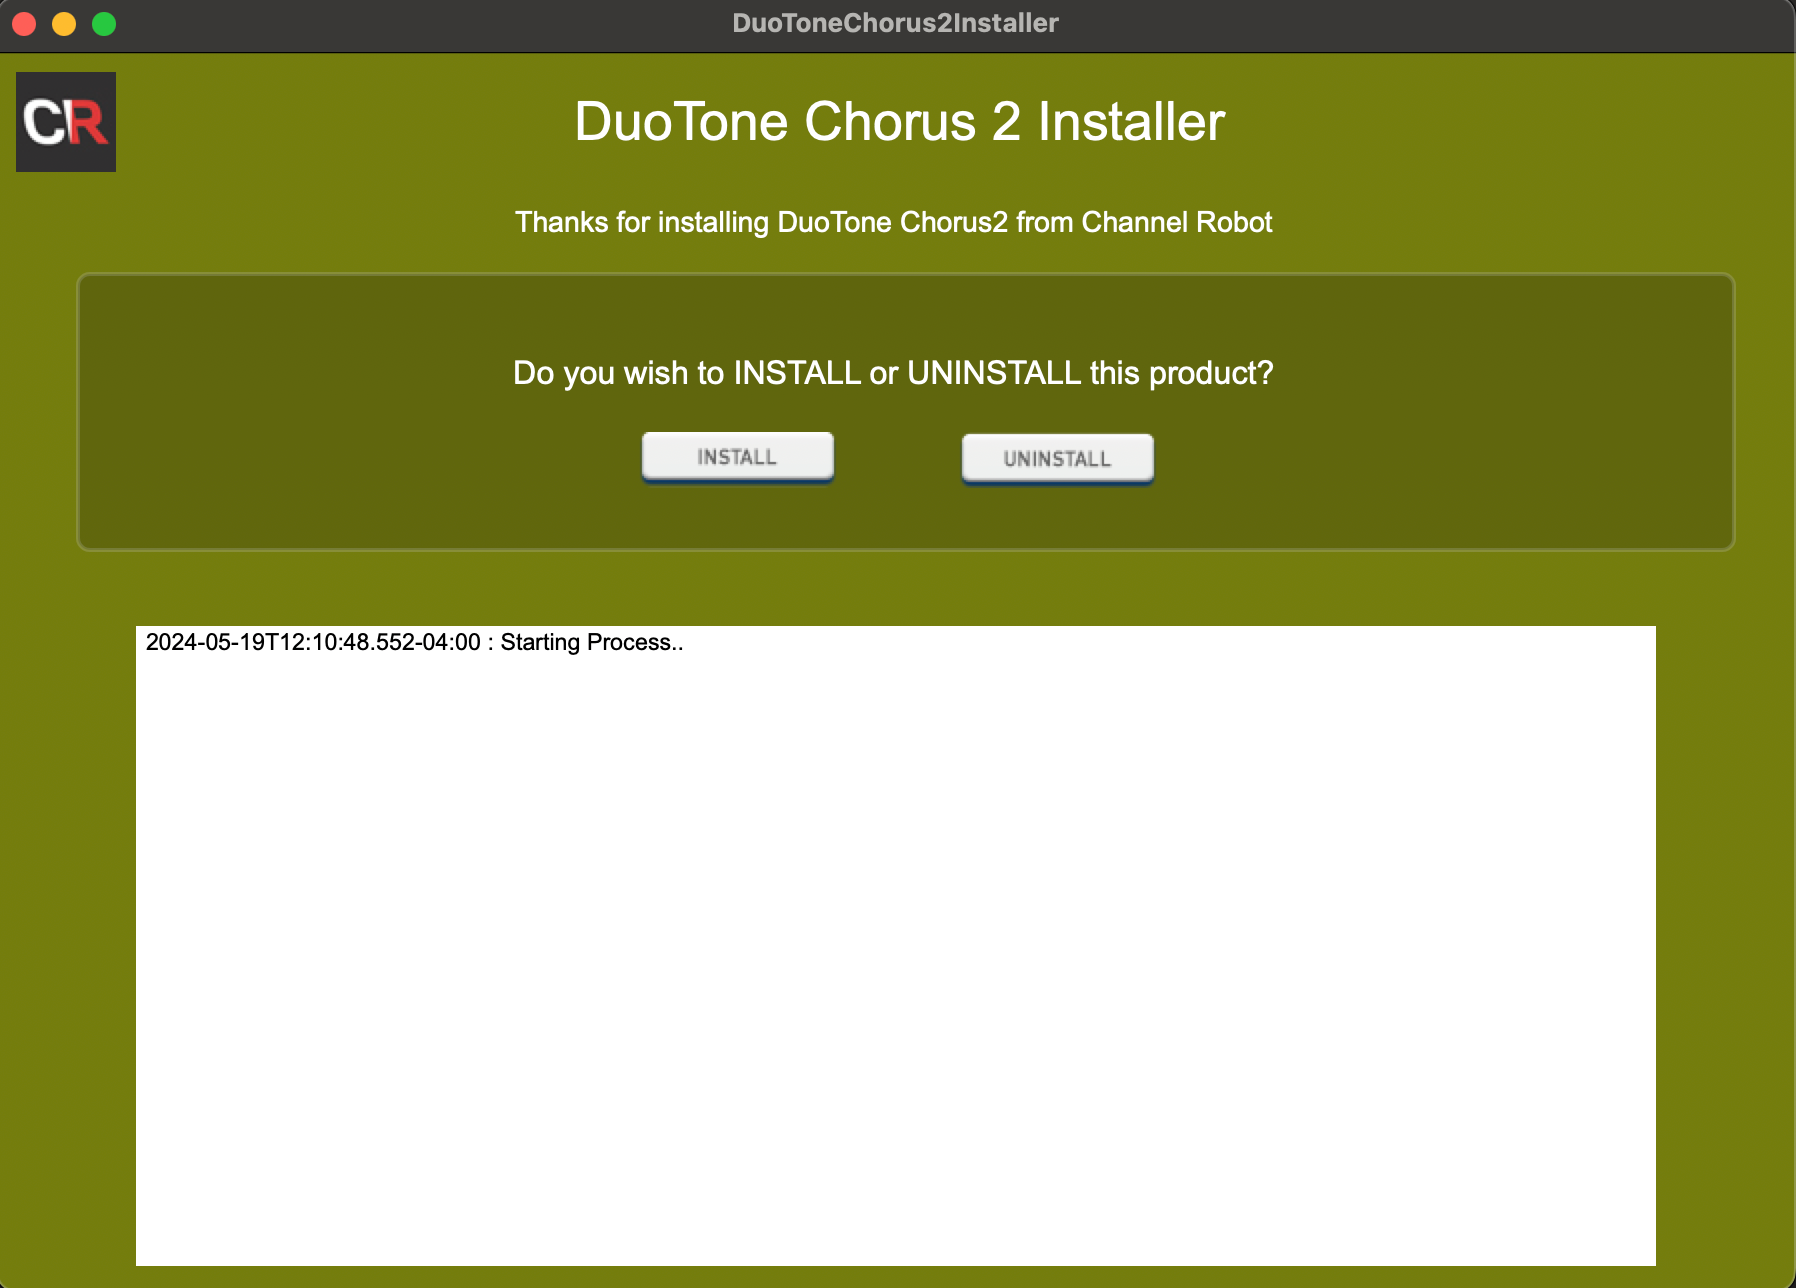
Learn more about it here.
 @Lindon, contact me to discuss the specifics of your installer, and I'll include them here.
HISE Project
HISE's forthcoming installer is shrouded in mystery and the enigmatic. They are the stories whispered in hushed tone by developers to their most-trusted confidants. Little is known about this mythical endeavour, but all be revealed when its time is upon us.
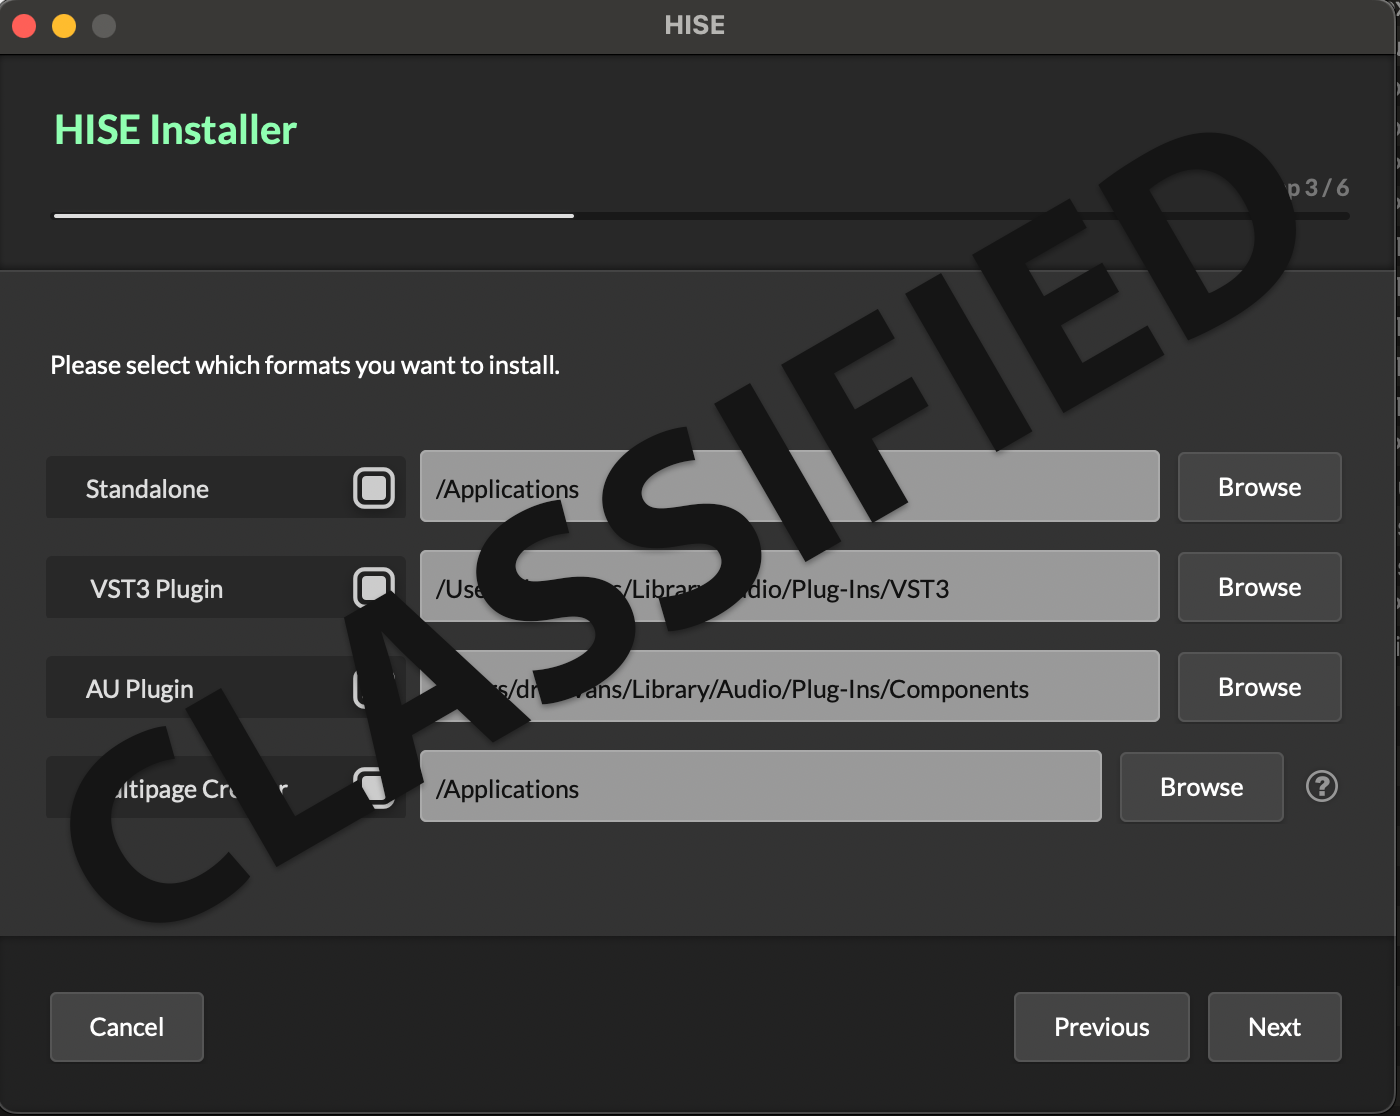
<A tantelising leaked image of the installer from whereabouts unknown.
Content Installers
HISE's Download API offers a robust, fully-customisable mechanism for downloading content. As such, you can provide feedback to users on every aspect of the installation procedure. It's also an excellent system for updates and expansions, and provides built-in copy protection.
The API is implement via scripting in your plugin. As such, you should be comfortable with programming in HISE's scripting system. Documentation is available here:
- An introduction to HISE scripting.
- Download API
- File API
- FileSystem API.
- Server API
- Unlocker API
- Engine API (createLicenseUnlock)
- The Hise Forum
@d-healey has created a powerful and user-friendly implantation as this API as part of Rhapsody. If you're not familiar with Rhapsody, check it out, as it's an outstanding system for deploying HISE products. It is also free and open-source.
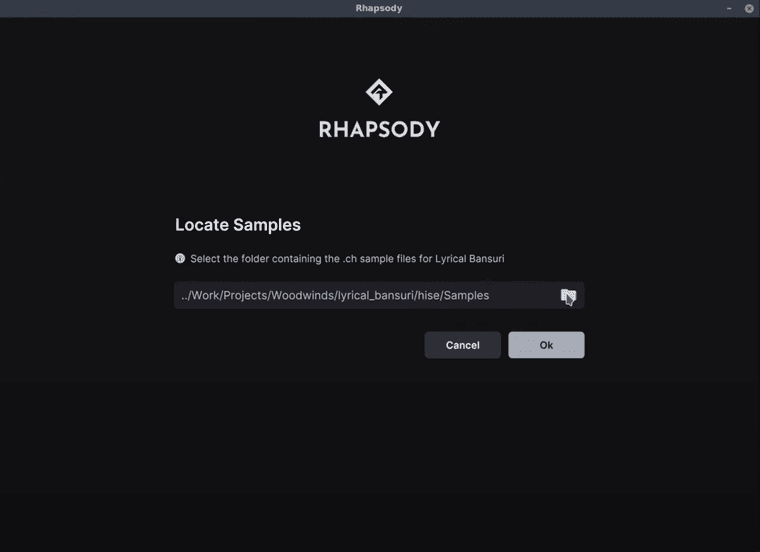
More information about Rhapsody can be found at the Libre Wave Libre Wave website. @d-healey has also been known to occasionally frequent the HISE forum, so you can catch him there.
 @d-healey , contact me to discuss your installer, so I can revise/expand this section accordingly.classified.png
 -
 U ustk referenced this topic on