Tutorial: macOS Code Signing, Notorising and Installer (Part II Added)
-
Introduction
This tutorial series will guide you through the complete workflow of building a macOS installer, including code-signing, notarization, configuration the installer package, custom icons and graphics, automatic updates, relevant HISE scripting, compiling, file management, installing additional files (including samples), Bash-scripting and more.
Commercial Solution
If you're looking for a pre-built installer solution, @Lindon has an excellent commercial installer specifically built for HISE.Feedback/Corrections
Please share!
TOC
- Developer Assets
- HISE Compilation Settings
Part I: Developer Assets
In this section, we will create the digital assets required to meet Apple's security policies for third-party executable files on macOS.:
- Your Developer ID and Entity name
- Developer Certificates
- App-specific password
- Manufacturer Code
Creating an Apple Developer Account
If you haven't already, create an Apple Developer account, either as an Individual or Organisation. The cost is $100/year (US).
Getting Your Team ID and Entity Name
 Find your Team ID and Entity name in Membership Details within the Membership section.
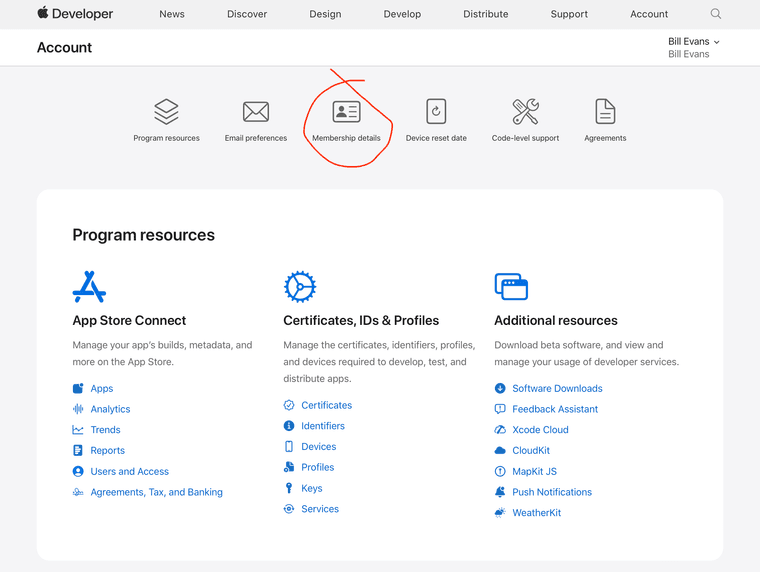
 Make a note of your TEAM ID, a 10-letter/number code unique to you as a developer.
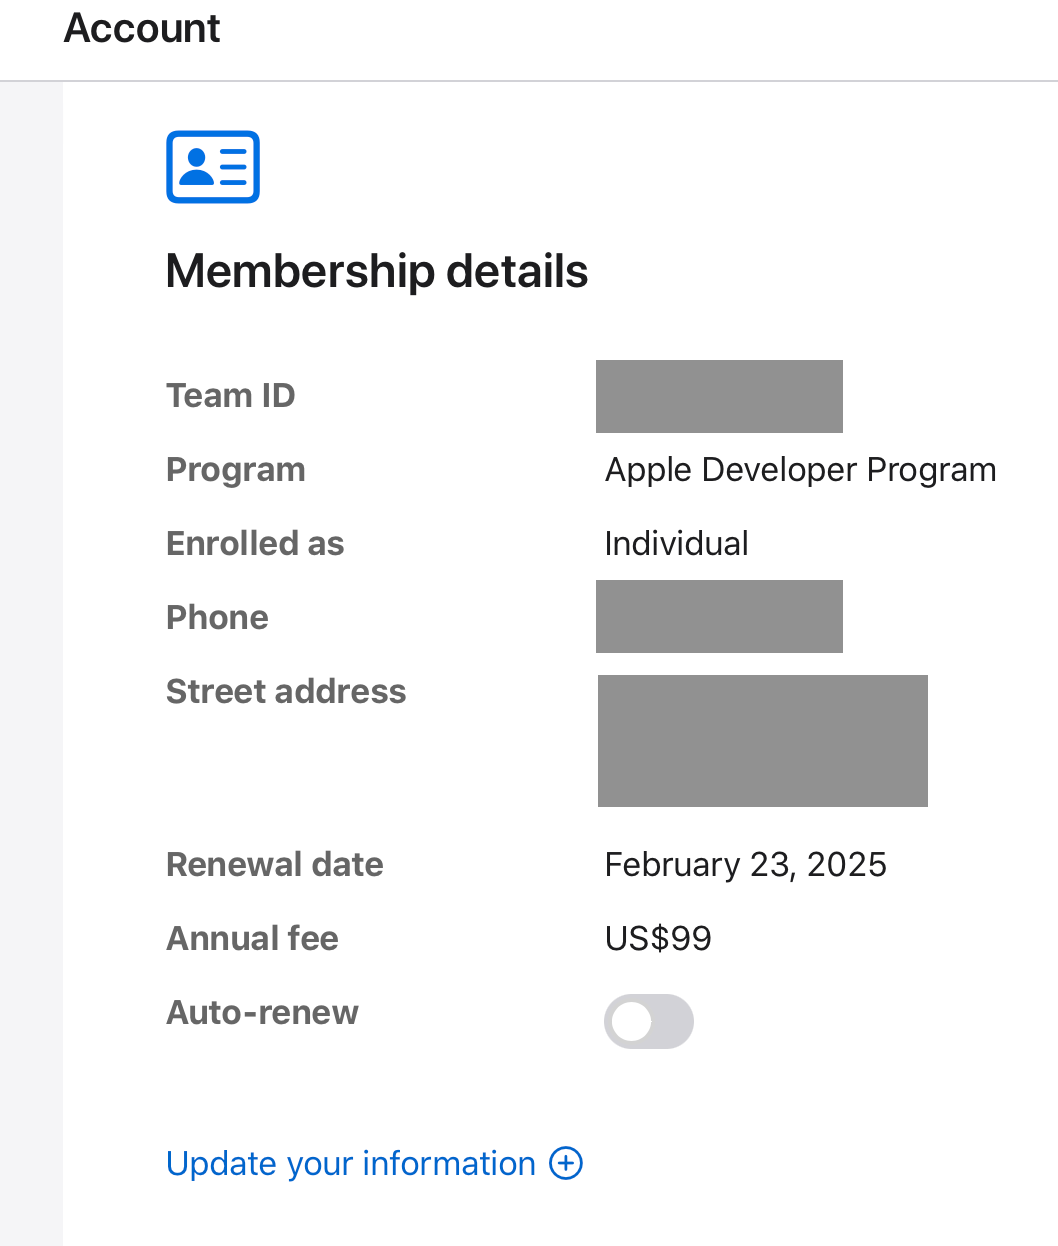
 Make a note of your Entity name. This process differs depending on if you have an individual or organisation account.
Individual: Your name, formatted exactly as in the upper-right menu item on Apple's Developer website (once you're logged in).
Organisation: Your "Entity name" as printed in Membership Details. (I'm an Individual member, so it doesn't appear in my screenshot.) It would be the first item listed:

 You now have your Developer ID and Entity name.
Generating Certificates
You'll need several certificates from Apple; which ones you need depend on the specifics of your distribution vector. For this tutorial, we'll cover the most common ones.
Click on "Certificates" in your Apple developer account. You'll see a list of the certificates Apple has assigned to you. Here's what it will look like when you're done: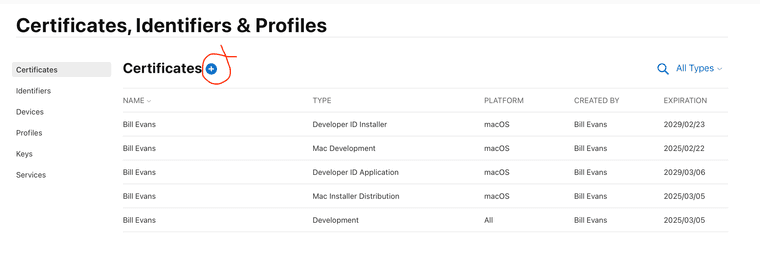
Just because a certificate is listed here does not mean it's ready to be used to create your installer.
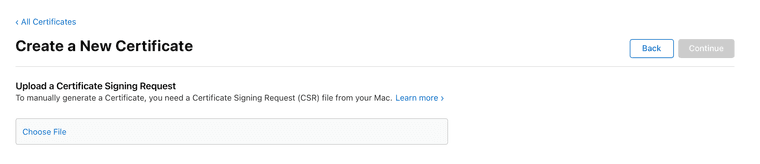
Click the '+' glyph to create a certificate, and then select one of certificate types in my list above.You'll see one of two dialog boxes, depending on which one you create:
or
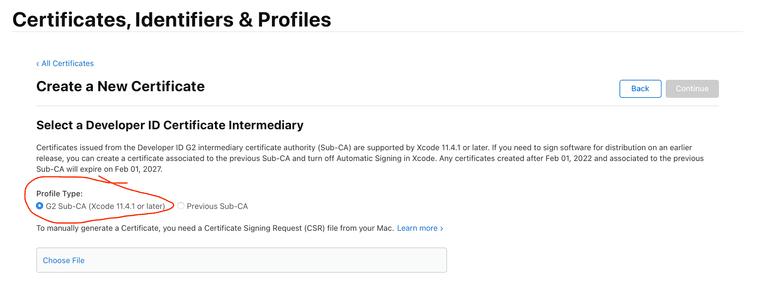
If it's the one above, ensure you choose the G2 Sub-CA Profile type.*
On your Mac, you'll create a generic Certificate Request file. launch Keychain, choose the Certificate Assistant, and "Request a Certificate from a Certificate Authority…"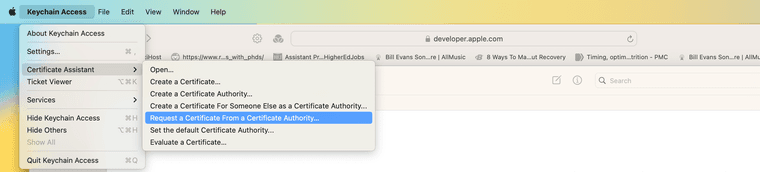
That will bring you to this dialog box:
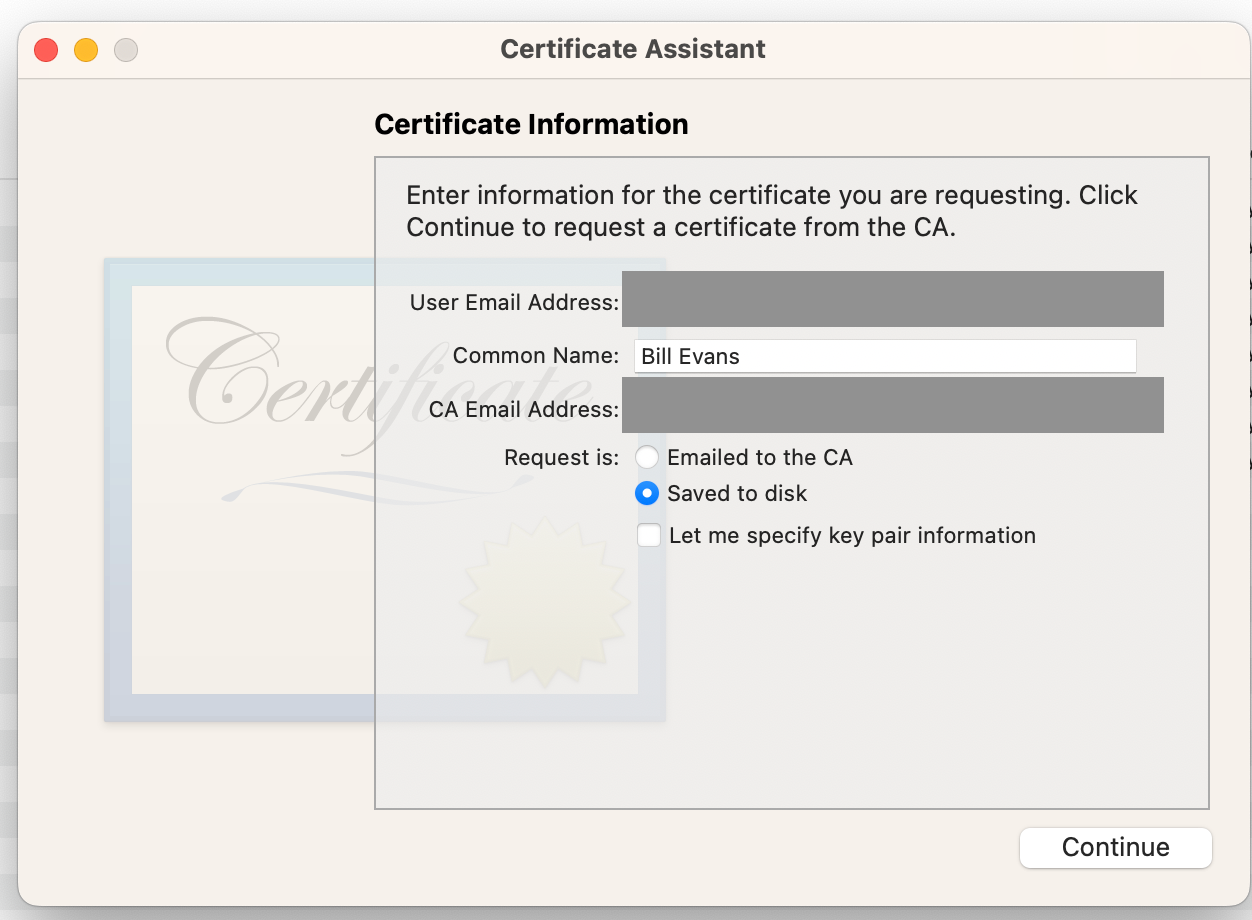 Fill out the dialogue box:
- For both email addresses, use your Apple ID (that used when creating your Apple Developer account).
- Choose "Saved to disk".
- Do not select "Let me specify key pair information"
Click continue, and save the Certificate Request to your local mass storage. The filename isn't important; you'll delete this file shortly.
 Return to the Apple Developer website, select "Choose File", and choose the certificate you created.
 Click "Continue", and download the Certificate to your mass storage.
 Delete the Certificate Request file.
 Install the Certificate by double-clicking it, and following the on-screen instructions.
 Repeat this procedure for all the Certificates in my list. When you're finished, ensure they're installed by checking in Keychain:
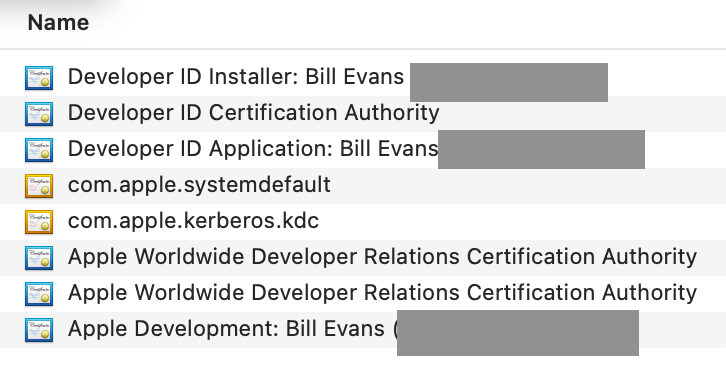
You're looking for blue certificates; the orange ones (com.apple.systemdefault" and "com.apple.kdc." are not related to this tutorial.)
You now have the necessary Developer Certificates.
App-Specific Identifier
Finally, we'll create an App-Specific Identifier (also known as an "App Password"). These passwords fulfill a variety of functions for developers; we'll be using ours simply for identification.
In the Account section of the Apple Developer site, choose Identifiers.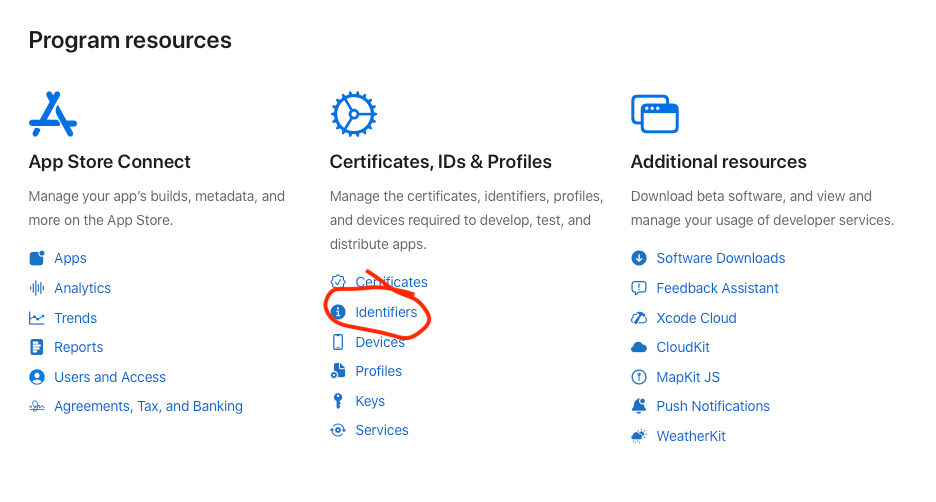 Click the "plus" icon.
 Choose "App IDs".
 Select "App".
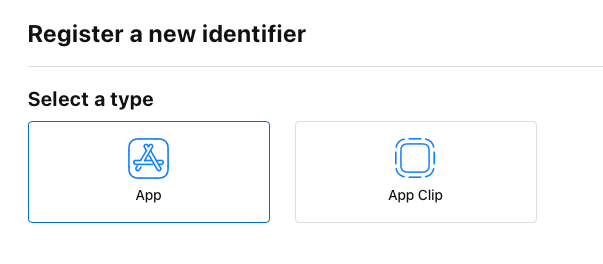 Configure your Identifier.
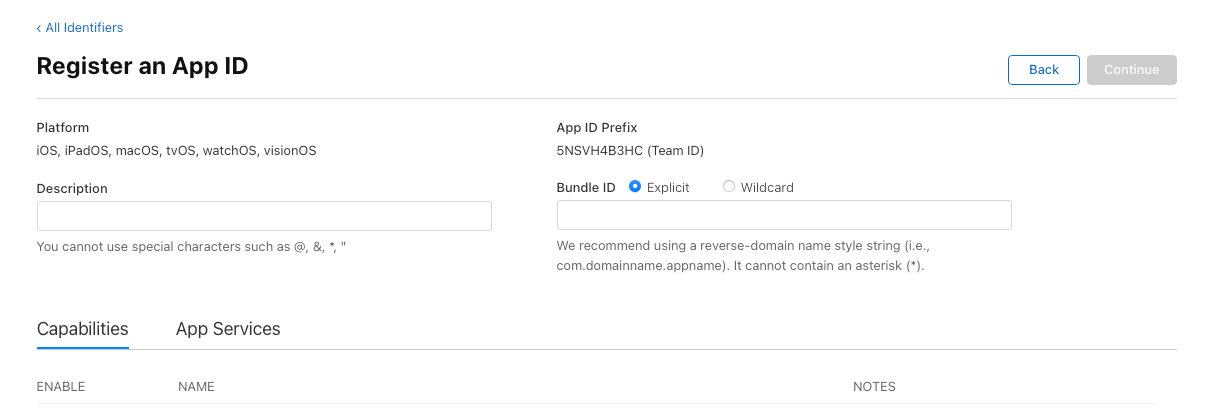
-
Description: A proper name that describes and differentiates the Identifier to you. (You can write anything here.)
-
App ID Prefix: This field is data. While you have a bit of leeway here, I suggest you follow Apple's suggestion of using a reverser-domain name (i.e., com.domainname.appname). Ensure that your data does not match any other macOS apps; I suggest using a domain name (minus the TLD) that you own. For example, if I have a plugin called "Fighting Ferret", a valid Prefix would be "com.porkinsrocks.fightingferret".
-
Capabilities/Services: Do not select anything in either of these of these tabs.
Click "Continue" to complete the registration of your Identifier.
You now have the necessary Application Identifier.
Choose a Plugin Code
This is a unique four-letter code that must contain at least one capital letter that uniquely identifies your AU plugin to the macOS.
Unfortunately, Apple no longer maintains this database (nor even active documentation on this topic). Regardless, you're still required to have one for each AU plugin you distribute. So…make one up, and hope nobody else is using it. Choose something based on your (or your organisation's) name, and avoid anything obvious (including variations on existing company names).
 You now have a Plugin Code. Theoretically.
-
PART II: HISE Compilation Settings
We'll look at two sections of your HISE preferences related to your installer. This is HISE executable you've been using to build your plugin — the options here don't apply to building HISE, itself.
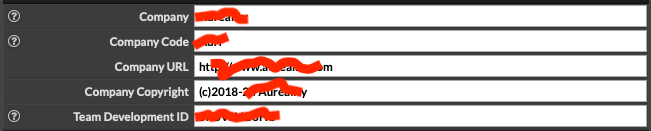
Developer Information
The key fields here are :
- Company Code: it should match your Plugin Code.
- Team Development ID: Your Apple Developer Team ID from the previous step.
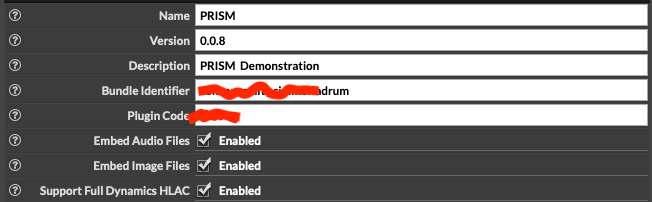
Product Information
- Product Name: Literally, this is the name of the plugin and/app file, after compilation. You'll also use this string later in building your installer.
- Version Number: Like Product Name, this will appear in the Finder, and also be used later in your installer.
- Plugin Code: The same string you used as the Company Code.
You now configured the options in HISE necessary for building your installer.
-
@clevername27 Your Company Code really shoild not be the same as your plugin code. You can use the same company code across all your plugin products and I think this along with yoir product code is what identifies tour plugon to au loading DAWs
HISE Development for hire.
www.channelrobot.com -
@Lindon Thank you - I'll check on that. I was thinking that because Apple no longer supports a database of either, that the only thing important is that the values are unique to your plugin.